Saturday, April 30, 2011

Betty Draper's "Gazpacho from Spain"

So even though it could be months until I hear from Food Network about my "casting opportunity", I figured I might as well continue testing the various recipes I had in mind for my menu.  I did tell you that I auditioned for a TV show on Food right?  Maybe not exactly, but oh well....I'll tell you about it another time....just waiting to hear now.  Could be months, but a girl has to eat!

Eventually the menu will come together for you all, and I'll share, but for now I'll just leave clues.  The first is in today's post's title.  Then we had the deviled eggs of last weekend...hmmm.  What could it be?

So today's adventure takes us to Spain to make Gazpacho.  Once again, I am turning the the Barefoot Contessa herself, Ina Garten for the base recipe.  The only thing I did differently was I added some red pepper flakes and about 1/4 cup of bread crumbs.  I am used to seeing that in these kinds of recipes so I added some here for body.

Gazpacho

(Serves 4 to 6)

1 hothouse cucumber, halved and seeded, but not peeled
2 red bell peppers, cored and seeded
1/4 cup breadcrumbs from day-old bread
4 plum tomatoes
1 red onion
3 garlic cloves, minced
23 ounces tomato juice (3 cups)
1/4 cup white wine vinegar
1/4 cup good olive oil
1/2 tablespoon kosher salt
1 teaspoons freshly ground black pepper

Directions:

Roughly chop the cucumbers, bell peppers, tomatoes and red onions into 1-inch cubes. Put each vegetable separately into a food processor fitted with a steel blade and pulse until it is coarsely chopped. Do not over-process!  You can even keep a bit of each vegetable aside, finely chopped, to add texture if needed.

After each vegetable is processed, combine them in a large bowl and add the garlic, tomato juice, vinegar, olive oil, salt and pepper. Mix well and chill before serving. The longer gazpacho sits, the more the flavors develop.

Yummy!

From Ina Garten’s “The Barefoot Contessa Cookbook”


Culinary School Chronicles - Tusan White Bean Salad

Even though I started Culinary Arts at George Brown two weeks ago - we skipped last weekend for Easter tho - this really felt like the first week we REALLY started because we actually got to cook something.  The first week was orientation, safety and sanitation procedures and then we watched the Chef demo how to make fish stock, chicken stock and beef stock.  Pretty basic stuff but important to get the basics down first before you move on to the next more complicated dish.

The class not only demonstrated the basics of stocks, it also focused on knife cuts - in this case - the dice.  I hadn't really thought about this too much but the size of the dice should be proportional to the length of time you are cooking a stock.  The longer the stock cooks, the longer you have to extract the flavours from the vegetables, so the larger the dice can be.

A fish stock takes only about half an hour, so the dice should be small (1/4" x 1/4" x 1/4").  For a chicken stock, which takes 2-3 hours normally, a medium dice is required (1/3" x 1/3" x 1/3").  And for a beef stock which requires roasting of bones and vegetables and takes 8-10 hours, a large dice is called for
(3/4" x 3/4" x 3/4").  There is a smaller cut still called brunoise which is teeny tiny at 1/8" x"1/8"x1/8".

From Columbus State Community College
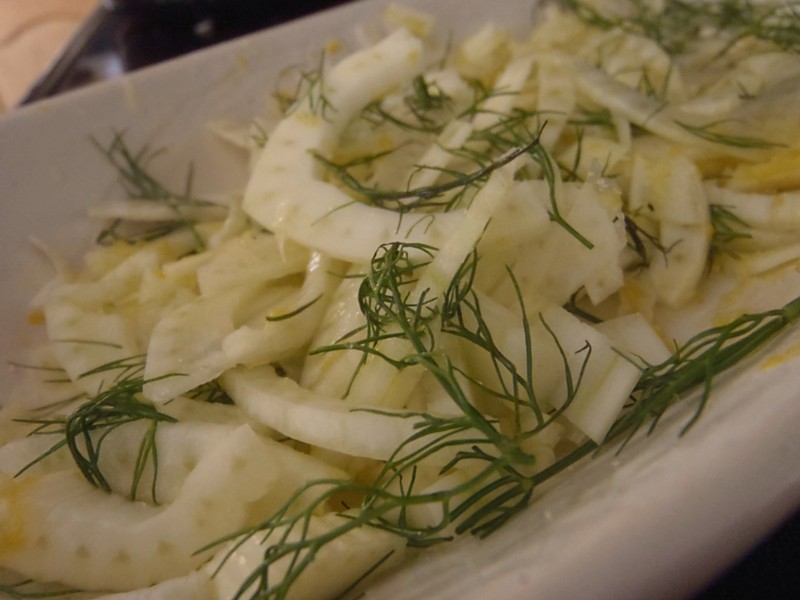
This week we focused on the julienne cut.  Julienne is the cut where vegetables or fruits are cut into long thin strips, or matchsticks.  There is a fine julienne (1/16"x1/16"x1-2"), julienne allumette  (1/8"x1/8"x1-2") and then the batonnet (1/4"x1/4"x1-2").  You can apply a similar technique to meat, but it is called emincé, and if you roll and very thinly slice herbs it is called a chiffonade.  Here's a link to a great knife cuts chart if you'd like a visual beyond the photo above.

I wasn't too excited about the Tusan White Bean Salad on the slate for today's lab, but it turned out to be a nice lunch, and something I could actually see myself taking to a summer potluck or family picnic. This recipe calls for dried beans that have been soaked over night (canned ones really wouldn't work in this preparation), so if you try it, be sure to soak yours the night before, or for at least 4 hours for same day use.  As usual, recipes in a kitchen are scaled, or weighed, so I have converted as best as I can the measures from weight to volume measure.

Tusan White Bean Salad

3/4 cup dry white navy beans, pre-soaked
1 package of proscuitto (115g or 4 oz), emincé
1/2 cup asiago cheese, grated
3 plumb tomatoes, seeded and julienned
1/2 yellow pepper, julienned
1/2 red pepper, julienned
1/2 red onion, peeled and julienned
1-2 cloves garlic, very finely chopped
1/4 cup olive oil
3 tablespoons red wine vinegar
juice of 1/2 lemon
10 sundried olives, pitted and finely chopped (add more if you like)
2 sprigs fresh oregano, chiffonaded
1/2 bunch basil, chiffonaded
3-4 sprigs parlsley, chiffonaded
1/2 teaspoon salt
1/4 teaspoon ground black pepper

Sachet:

Wrap together in a piece of cheesecloth and tie off with kitchen string:

1 sprig parsley or a few parsley stems
1-2 bay leaves
12 black peppercorns, crushed
2 cloves

Instructions:

Soak the beans over night in enough water to cover by 2 inches.  Drain and rinse before using.

Place beans in a pot with enough water to cover by 2 inches.  Add the satchet to the pot.   Simmer until the beans are tender, about 30-35 minutes.  Drain and allow to cool.

Cut up all vegetables, herbs and seasonings and combine in a large bowl.  Add olive oil, vinegar, lemon juice, salt and pepper and allow to marinate for about 30 minutes.  Add in cold beans, proscuitto and asiago cheese and combine.  Adjust seasoning and serve!

An interesting note is that if you are serving the dish same day you can add the proscuitto, but if you are making ahead a day, then wait to add the proscuitto until a few hours before serving as the acid in the salad (vinegar and lemon juice) will bleach the meat making it look grey and unappetizing.


Friday, April 22, 2011

Deviled Eggs with Green Onion Oil - Yum Yum too!

The second type of deviled eggs I am making involves green onions, garlic, ginger and canola oil.  I wasn't sure about this concept when I started but, hell, I am sold now.

Green onion oil is central to David Chang`s Momofuku cooking, as he uses it in many dishes like a finishing sauce.  My fellow blogger over at Momofukufor2 has come up with her own version of the oil which she likes better than Chan`s.  I found her recipe so intriguing that I had to try it myself; however, I found I needed to eliminate the sesame oil from her recipe because it overpowered the more subtle tastes of the green onion and ginger on my first test run.   I also messed around a bit with her proportions - I added more ginger and, well, more of everything, and all I can say about the end result is WOW!

By the way, David Chang announced last month that he will be opening not one but two restaurants in Toronto, the genesis of which was apparently inspired by a drunken weekend in my fair city.  Works for me!  2 Chang restos = 2 times the good food.  And I am tired of Italian inspired after Italian inspired restaurant opening here....and I am not into the `nose to tail` or burger themes in the city, so we need something new!  Welcome Momofuku!  The only restaurant opening that has recently caught my attention is Lynn Crawford`s Ruby Watchco on Queen East.  It is great and I cannot wait for my second visit for my birthday next month (Yes I am a Taurus, and that does explain a lot, I know!)

How to boil eggs à la Martha:

As I have said before I subscribe to the slow cooking of hard boiled eggs method preached by the Domestic Goddess Martha. Listen to Martha's gospel regarding the hard boiling of eggs:

To hard boil eggs, place large eggs in a single layer in a medium sized sauce pan and cover with cold water by 1 inch.  Add 2 teaspoons white vinegar to the water.  This will help bind the egg white.  Bring to a boil over high heat, cover and then immediately remove from heat.  Let sit for 12 minutes, then using a slotted spoon remove eggs from cooking water and transfer to a bowl of ice water to stop cooking.  Let cool for at least 5 minutes before using.

Green Onion Oil Devilled Eggs 

6 hard boiled eggs, peeled, chilled and cut in half
1 bunch of green onions, very thinly sliced (about 1 cup)
2 cloves of garlic, minced very finely
2 tablespoons ginger root, finely chopped
1/4 cup canola oil
1/4 tsp salt


Directions:

Hard boil the eggs.  Peel eggs by cracking shells gently on a cutting board and removing the shell.  Cut your eggs in half and remove the yolks from the eggs and place in a separate bowl.  Mash yolks with a fork until crumbly.  Set the whites aside until you are ready to fill them.

Make the green onion oil by heating up the canola oil in a small pot over high heat. When the oil is shimmery and hot, add the green onions, garlic, shallot, and ginger. Remove the pot from the heat. Salt to taste.

Add 2 tablespoons of the green onion oil and mix. Stir and taste.  Slowly add more green onion oil a teaspoon at a time until the desired texture is reached.  I used all of the oil and green onion mixture.

Spoon a heaping teaspoonful of egg filling into each half egg white.  Top with a sprinkle of sesame seeds if desired.

Eat and enjoy.


Deviled Eggs with Kimchi & Bacon - Yum Yum


It has been absolutely years since I made deviled eggs but in preparation for a special visitor on Monday, I am messing around with some potential appetizer recipes.  I have been messing around with the idea of an updated 60s theme menu, so deviled eggs are on the list.  Deviled eggs have a bad reputation, but let's face it - done well they will disappear off a party table in minutes flat.

Initially I thought of updating them with some of the ideas from my Edemame Hummus experiment, but after a lot of searching, I cam across two interesting variations on deviled eggs that I decided I should try from Momofukufor2.  I liked the concept behind both recipes, and the fact that the kimchi eggs necessitated a trip to Korea Town (Bloor and Christie area) in Toronto.

There are a variety of methods for hard cooking eggs, but I have subscribed to the Martha Stewart school of egg cookery for a number of years.  I find that any other method leaves me with that grey tinge around the outside of the egg yolk (sulphur) and I don't find that appetizing.  Domestic Goddess Martha says that the best "boiled eggs" aren't actually boiled at all - they are slow cooked, which prevents the whites from becoming rubbery.

How to boil eggs à la Martha:

To hard boil eggs, place large eggs in a single layer in a medium sized sauce pan and cover with cold water by 1 inch.  Add 2 tablespoons of white vinegar to the water. Bring to a boil over high heat, cover and then immediately remove from heat.  Let sit for 12 minutes, then using a slotted spoon remove eggs from cooking water and transfer to a bowl of ice water to stop cooking.  Let cool for at least 5 minutes before using.

Kimchi Bacon Deviled Eggs

6 eggs
1/4 cup chopped kimchi (available at Korean grocery stores)
4 precooked bacon rashers, nuked for 30 seconds and chopped into small pieces)
1/4 cup mint leaves, thinly sliced and chopped
3 tablespoons low-fat mayonnaise
1/4 teaspoon salt


Directions:

Hard boil the eggs using your chosen method, and cool to room temperature.  Peel eggs by cracking shells gently on a cutting board and removing the shell.  Cut your eggs in half and remove the yolks from the eggs and place in a separate bowl.  Mash yolks with a fork until crumbly.  Set the whites aside until you are ready to fill them.

Reserve a tiny amount of kimchi, bacon and mint for garnish, then add the rest to the bowl with the egg yolks. Add the mayonnaise and gently mix until the egg yolk mixture comes together. If it looks too dry, add a touch more mayonnaise. Using a teaspoon, scoop the filling into the egg white halves and garnish with the reserved bacon, kimchi and mint.

Taste, and adjust seasoning with salt and pepper.  Most importantly, eat and enjoy.

Wednesday, April 20, 2011

Cilantro Rice

This is a nice bright tasting rice that is a really nice addition to almost any basic meal.  It would also be nice with some corn kernels added. 

Ingredients:

1.5 cups dried jasmine or basmati rice
3 cups water
1 teaspoon salt
juice of 2 small or 1 large lime
zest of 1 lime
3 green onions choped
2 bunches fresh cilantro, chopped
salt to taste.

Directions:

Bring water to a boil over high heat. When boiling, add in rice, return to a boil, and then cover and reduce heat to low and cook for 15 minutes. Once your rice is cooked fluff with fork. Add lime juice, zest, green onions, cilantro and salt. Serve warm.

Korean BBQ Short Ribs (Kalbi)

I have been wanting to try to make Korean short ribs for ages, but I never seemed to see them in my grocery store, then the other week I came across some at my local meat outlet.  I live in an area of Toronto that is now referred to as Upper Junction or The Stockyards.  Twenty years ago when first moved to this part of west Toronto, the word "stockyards" had much more meaning, much like the Meat Packing district in New York.   The area was very industrial and it was the dreaded place where cows, pigs and chickens came to give up their lives to make an appearance on our dinner plates.

From the Archives of Canada Packers
This incredibly cool photo shows what it looked like across the road from us in 1960!  I moved into this area in the late 1990 and I can tell you that while some of the industry was gone then, there were still terrible wafts of barnyard that still came from the yards, especially on a hot summer day.

Today almost all of the industry has gone, replaced by town homes, retail and Big Box, but there still remains one abattoir and a number of meat packing plants, which means great access to cheap meat for us.  This is a long lead up to the fact that finally Meat Stop had some beef short ribs in their freezer section that will be turned today into Kalbi by me!

Korean-style short ribs can be found in most Asian markets and also some regular grocery stores.  The meat cut is called flanken, which is an unusual cut to North Americans because the beef is cut across the bone instead of along the bone as we are used to.  The short-ribs are then marinated over-night in  then grilled to be slightly charred on the outside, but medium rare on the inside.

There are lots of recipes for Kalbi out there on the internet but am turning for inspiration to the one from Howard Yoon at Kitchen Window for his family`s long time recipe.  I have modified the recipe slightly, mostly to scale the quantities and to substitute things like white sugar for brown, etc.  And I added in some ginger.

Korean BBQ Short Ribs (Kalbi)

(Serves 4)

2 pounds short ribs (flanken cut)
1 tablespoon sesame seeds, toasted (for garnish)

Marinade:

3/4 cup soy sauce
2 tablespoons brown sugar
2 tablespoons sesame oil
2 tablespoons corn or canola oil
4 cloves garlic (chopped)
1 inch ginger (grated)
3 green onions (sliced)
1 tablespoon sesame seeds (toasted and crushed)

Directions:

Combine the soy sauce, sugar, sesame oil and corn/canola oil in a large mixing bowl. Add garlic and green onion and stir together. Put short ribs into large ziplock freezer bag (you may need two). Pour marinade into bag and turn bag over several times to ensure all meat pieces are covered. Refrigerate for at least four hours, but preferably overnight. Turn bag at least once in the middle of the marinating process.

Heat grill to medium-high heat before adding the meat. Drain excess marinade off short ribs and grill them until medium, about 6-8 minutes. Sprinkle with toasted sesame seeds and chopped green onions. Serves 4.


Serve with Cilantro Rice

Saturday, April 16, 2011

Justin's Junior Chef Bloggette - Lobster Mac'n'Cheese

Today for a special surprise for my Dad I wanted to make something cool.  I wanted to make macaroni and cheese.  My mom had the idea to make it even more special by putting lobster in it!  I bet it will be good.  Anything tastes better with lobster in it!  But you could make it just as is or with some pancetta in it. We also made homemade potato chips and the best Onion Dip ever.

This recipe comes from Ina Garten, who has a TV show called the Barefoot Contessa.  My mom likes her books and recipes.  We changed the recipe a little bit but it is pretty much as she wrote it.

What you need:

2 tablespoons Kosher salt for pasta water
Vegetable oil or non-stick spray to grease your casserole dish
500 grams (1 lb.) elbow macaroni
1 quart milk
8 tablespoons unsalted butter, divided
1/2 cup all-purpose flour
8 ounces Gruyere cheese, grated (4 cups)
8 ounces extra-sharp Cheddar, grated (2 cups)
1/2 teaspoon freshly ground black pepper
1/2 teaspoon nutmeg
1 pound cooked lobster meat (we used 6 Canadian lobster tails - uncooked)
1 cup panko (Japanese breadcrumbs)

Directions:

Preheat the oven to 375 degrees F.

Drizzle oil into a large pot of boiling salted water. Add the pasta and cook according to the directions on the package, 6 to 8 minutes.  Drain well.

Meanwhile, heat the milk in a small saucepan, but don't boil it. In a large pot, melt 6 tablespoons of butter and add the flour.  Cook over low heat for 2 minutes, stirring with a whisk. Still whisking, add the hot milk and cook for a minute or two more, until thickened and smooth. 

Off the heat, add the Gruyere, Cheddar, 1 tablespoon salt, the pepper, and nutmeg. Add the cooked macaroni and lobster and stir well. Place the mixture in a large greased oven proof dish.  Melt the remaining 2 tablespoons of butter and combine them with the Panko.  Sprinkle over top of the casserole and bake for 30 minutes or until the sauce is bubbly and the macaroni is browned on top.

Cook's Note:  Lobster Butter:  If you really want to go over the top, removed the shells from your lobster tails, leaving the tails intact.  Poach your raw lobster slightly in 2-3 tablespoons butter for a few minutes, then drain on a paper towel.  Add shells back to the butter and cook for 5 minutes until the shells turn red and you extract the flavours.  Remove shells from pot and let cool - reserve for another use.  Pour lobster butter into a small ramekin to keep for the breadcrumbs.  Chop lobster tails roughly before adding meat to mac`n`cheese.

Caramelized Onion Dip with Homemade Baked Potato Chips

Before I even write anything, I have to say this is the best damn chip dip I have ever eaten in my life.  Normally, I cannot bear the thought of camping without a container or two of 99 cent Dip`a`Chip but after today`s delight, I don`t think I ever want to eat another chip dip but this one again.

I like the concept in cooking of `high-low`pairings, which basically means taking everyday things and making them luscious with high end ingredients.  Lobster Mac`n`Cheese is the perfect example.  Or potato chips drizzled in truffle oil (there`s a use for you for those truffles Norma!). Actually, next time I make chips I will have to try the truffle thing.

Any way I liked the fact that this recipe elevated the humble chip dip to new heights and then tossed in the homemade chips for good measure.  Making potato chips was way easier than I imagined, but you do have to keep an eye on them or they can get too dark or cook a bit unevenly.  For best results, make the onion dip ahead so it has time to cool and the flavours to meld.  It is even better on day 2.

++++++++++++

Caramelized Onion Dip (by Ina Garten)

(Makes about 2 cups)

2 large yellow onions (should yield about 3 cups)
4 tablespoons butter
1/4 teaspoon cayenne pepper
1 teaspoon sea salt
1/4 teaspoon ground pepper
1/2 block reduced fat cream cheese, at room temperature
1/2 cup sour cream (we used fat-free)
1/2 cup reduced fat mayonnaise

Directions:

Cut the onions in half and then slice them into thick half rounds.  Heat the butter in the bottom or a large non-stick fry pan over medium heat.  Add the onions, cayenne, salt and pepper.  Sauté for about 10 minutes.  Reduce heat to medium-low heat and continue to cook for another 20-30 minutes until the onions are very soft, brown and caramelized (see the colour of mine on top of the dip).

Allow the onions to cool slightly.  Keep about 1/4 cup of the onions aside to top your dip.

Place cream cheese, sour cream and mayonnaise in the bowl of a food processor and beat until combined. Add in the remaining onions, half of the batch at a time, and pulse to incorporate.  Add salt and pepper if needed.

Serve with homemade or good quality store bought chips, veggies, etc.

++++++++++++

Homemade Baked Potato Chips

Ingredients:

2-3 large baking (russet) potatoes, cleaned with skin left on
3 tablespoons olive oil
Sea salt (I used a Smoked Fleur de Sel that I found at Metro)

Directions:

Preheat oven to 400 degrees.  Slice the potatoes very thinly, either using a food processor or Mandolin, then toss them in a large bowl with the olive oil, coating well.  Season lightly with salt and toss by hand again.

Cover 2 baking sheets with parchment paper.  Arrange chips in a single layer on baking sheets.  Bake in preheated oven for about 12-15 minutes.  The chips will cook at different speeds if they are different thicknesses so keep a close eye on them, removing anyones that look crispy and ready. Transfer any ready chips to a plate to cool and sprinkle immediately with salt.

I think you know what to do with these babies!

Tuesday, April 12, 2011

Sesame Beef and Broccoli Stirfry

This is a quick week-night dinner and a great use for left over steak.  We like it and it is a hit with the kids, so it is win-win for us.  I think I found this recipe ages ago on www.cooks.com but, as usual, I've changed a few things here and there to suit our preferences.  You could use a pre-packaged raw broccoli mix or even frozen if you had to, but fresh is always best!  I've also written the recipe so you can use raw or left over steak.


Stir-fry ingredients:

1 bag mixed broccoli and stir-fry vegetables OR
1 pound broccoli, cut into florets with any stems cut into small pieces and 
1 cup carrots, peeled and chopped into thin slices
3/4 pound left over flank steak, cut against the grain into thin slices OR
3/4 lb. raw boneless sirloin, cut across the grain into 1/4 inch thick slices
1 can sliced water chestnuts 
2 teaspoons soy sauce
1/4 teaspoon sugar
1/4 teaspoon salt

Mix soy sauce, sugar and salt in a small bowl. Pour over meat and allow to marinate for approximately 15 minutes.

Stir-fry Sauce:

1 tablespoon cornstarch
1 tablespoon soy sauce
1/2 teaspoon ground ginger
1 tablespoon garlic puree
1/4 cup chicken stock
1 teaspoon sugar
2 teaspoons sesame oil
1/4 cup water

While beef is marinating, mix all above ingredients in a metal bowl with a whisk and set aside.

Directions:

Heat 2 tablespoons vegetable or neutral oil in a large skillet or walk over medium high heat.  When hot add carrots and stir for about 3-5 minutes or until carrots start to soften.  Add in broccoli, and continue to stir-fry.  Add in half of the water to steam-fry the veggies.  When it has evaporated, add in the remaining water.  Once evaporated again, add in beef and toss.  Pour stir fry sauce over mixture and toss well.  The cornstarch should cause the sauce to thicken quickly and coat the meat and veggies.  Cook for approximately 1-2 minutes.

Serve with steamed rice.

Waste Not! Issue #2: Flank Steak

So this is my second attempt at creating multiple dishes out of one base dish which can be re-worked once or twice during the week.

The base dish for this week is flank steak.  Flank steak is a  long thin piece of meat cut from the abdominal muscles of a cow (who ever thought that cows had abs, eh?).   When my Mom first started making flank steak it was because it was fast to cook, very inexpensive and could be stretched for a number of meals.  While flank steak isn't as inexpensive as it was 30 years ago, it is still a fast meal and a good value compared to other marinating steaks and a left overs can be used in a variety of ways.

Because flank steak (also called bavette) comes from the cow's abdominal area (he he cow abs again...) it is rather tough and lends itself best to marinating to break down the tough fibres and impart flavour.  Flank steak also has a grain.  If you look at it closely you will see the long fibres of the meat run in one particular direction.  When cutting flank steak it is best to cut the mean against the grain for optimum tenderness.  Also, flank steak is best served medium to medium rare.  Over cooking will result in dry meat, plain and simple.

Round 1:

My Mom's "Special" Flank Steak

The first round stars my Mom's age-old recipe for flank steak.  If you are a creative chef you can vary the basic recipe in a million ways to change the flavour.  With cilantro, lemon grass and fish sauce it could have a Thai bent.  With oregano, basil, parsley and garlic, an Italian one....you get the idea.  But my Mom`s receipe is tried and true, never fails, and is loved by everyone, especially my kids.

The flank steak will be accompanied by my two all-time favourite side-salad recipes, both of which make repeat appearances on our camping and cottage trips on a regular basis, not to mention at home.

Blue Cheese Potato Salad
Fennel Lemon Salad

During the week, any left overs can be used up in one or both of the following quick recipes, depending on whether or not you have inhaled all the steak on Round 1.

Round 2:

Sesame Beef and Broccoli Stirfry with steamed rice

I had hoped to have a round three of the following, but the Special Steak proved so popular Sunday night that there was only enough left for Stir fry.  Next time....

Round 3:

Black and Blue Sandwiches seved with Mesculin Greens and Balsamic Vinaigrette

The "black" in the sandwich is the meat (because it is seared I guess), and the "blue" is the blue cheese (and it could also be the meat depending on how rare you cooked it to begin with.  The hot sandwich is paired with a simple side salad of greens and a basic Balsmic Vinaigrette.

Sunday, April 10, 2011

Fennel Lemon Salad

Another favourite from my cottage-camping repertoire.  The salad is simple, yet elegant and would be at home on any dinner table.  Interestingly, fennel actually comes in two different shapes - round and then more oblong and slightly flattened.  The round bulbs, called maschi, are actually the male fennel and the oblong bulbs, or femmine, are the female fennel.  The round bulbs tend to be more available at the beginning of the season and the oblong, female ones later in the season.  Apparently the female ones are more prone to seed, hence the fertility connection to the feminine.  I do not really find that there is a taste difference between the two, but the maschi are supposed to be sweeter. As if a male could be sweeter than the female!  Pfffft!!

Ingredients:

1 bulb fennel (look for one with lots of fronds)
1 lemon
2 tablespoons olive oil
1 teaspoon sugar

Slice the fennel in half and remove the hard, central core and cut off the tops at their base. Pluck the fronds off the tops and reserve for later use.

Slice the fennel bulb very thinly using a knife or a mandolin if you have one.  Place in a medium sized salad bowl. Zest the lemon and sprinkle on top of the fennel.  Add reserved fronds.  Squeeze juice from lemon on top of the salad.  Sprinkle with sugar.  Toss.  Allow to macerate for about an hour before serving.

Blue Cheese Potato Salad

This potato salad is my favourite and a perfect accompaniment to grilled flank steak.  Do not be frightened by the blue cheese - it adds an amazing tang to the potatoes that is just out of this world.  My suggestion - as always - if you don't like blue cheese is.....try it again.  There are so many wonderful varieties out there that it is just a shame to exclude such an amazing type of cheese from your life.  If you must, just add a small amount of cheese to the salad to start (maybe 1/4 cup) and build your way up.

Blue Cheese Potato Salad

(Serves 4 to 6)

Ingredients:

1½ lbs mini potatoes (white, ruby red, mini purple or a combo are great)
3 strips bacon
1 red pepper, cut into ½-inch (1-cm) pieces
2 green onions, thinly sliced
10 chives, finely chopped

Dressing:

1/2 cup low fat mayonnaise
1/2 cup fat-free sour cream
2 tbsp (25 mL) lemon juice
A couple of dashes hot pepper sauce
1/2 cup to 1 cup crumbled blue cheese (Rosenburg Blue is preferred for this salad)
Salt and pepper to taste

Scrub potatoes then cut into quarters. Place in a large saucepan of salted water, set over high heat and bring to the boil.  Cover and simmer until potatoes are just tender, about 8 to 10 minutes. Drain well, then set aside in a bowl. 

Meanwhile, cook bacon over medium heat until crispy. Set aside on a paper-towel-lined plate, then crumble. Alternatively, use 3 strips of pre-cooked bacon, finely chopped (works a charm when camping and no mess!)

For dressing, combine mayonnaise with sour cream, lemon juice and hot pepper sauce in a bowl. Stirblue cheese, chives and green onion.

Stir dressing with warm potatoes until mixed. Add bacon, red pepper and green onions.  Refrigerate for minimum 2 hours before serving, or make the night before to ensure that the flavours have time to absorb into the potatoes.

Enjoy!


Smoked Salmon Eggs Benedict Strata

One of my favourite dishes is Eggs Benedict.  It is not terribly difficult to make for a few people but this weekend I am having a 3 friends over for brunch and I think my husband and kids might expect to eat also. Not sure about how to orchestrate serving Eggs Benny for 7, so I thought I would give a recipe idea I saw Emily Richards from Canadian Living Cooks a try.

Basically Emily turned traditional Eggs Benedict into a strata which makes preparing 8 portions at once do-able. A strata is more or less a savoury bread pudding.  Strata is a great brunch dish because it is made ahead of time by layering ingredients in a casserole dish, and then pouring an egg mixture over top which absorbs into the bread as it sits.  The Strata is chilled overnight and then brought up to room temperature before baking.  You can make this recipe the night before and pop it in the oven before your guests arrive.

I've amped up Emily's recipe by swapping out the ham for smoked salmon, and the Swiss cheese for a lovely fig goat cheese.  I am also serving the strata with a Caper Hollandaise.

The Hollandaise recipe is a quick, lower-fat version than the Julia Child one I have made previously, and does not require you to stand over a stove for minutes on end whisking.  It also incorporates one of my other favourite things in life - capers.

Smoked Salmon Eggs Benedict Strata

8-10 English muffins
10 eggs
16 slices smoked salmon, half for inside muffin and half for rosettes to garnish
1 log goat cheese cut into 8-10 coins
1/4 cup thinly sliced red onion
2 tablespoons fresh dill, chopped

2 cups 1% or 2% milk
1 teaspoon Dijon mustard
1/4 tsp salt
1/4 tsp pepper

The night before:


Preheat oven to 400 degrees.  Split English muffins and toast lightly for approximately 5 minutes.  Allow to cool.


Spray the inside of a 13- x 9-inch glass baking dish well with cooking spray.  Place single layer of English muffin bottoms in pan.  You can fill in with half muffins if you like. Lay one slice of smoked salmon on base, then goat cheese coin, dill and red onions.  Place muffin lid on top and press down firmly.

In mixing bowl, separate 3 of the eggs, reserving 3 yolks for the hollandaise.  Whisk together egg whites, remaining eggs, milk, mustard, salt and pepper.  Pour liquid evenly over entire English muffin base.  PCover and refrigerate for minimum 2 hours to allow the liquid to absorb.  You can make this dish ahead to this point and keep for up to 12 hours.  If you can, flip the muffins half way through the fridge time.

When ready to cook….

Preheat oven to 375 degrees.   Bake in oven until puffed, golden and set enough that strata doesn't jiggle in centre when gently shaken, about 1 hour.  Allow to cool for 5 minutes before cutting.

While the Strata is cooking, make smoked salmon rosettes with remaining smoked salmon.  Cut the remaining salmon slices in half length-wise (about 3’ long x 1”deep) and form a rose by rolling each slice and pinching one of the ends.  Turn the tops of the smoked salmon back and out slightly to give the look of a flower.

To serve, plate each English muffin in the centre of a plate, top with Caper Hollandaise, 2 rosettes and and a further sprinkle of dill.


Here's Emily's original recipe for anyone interested:

Eggs Benedict Strata

Thanks for the lovely company and delightful conversation ladies!  And happy birthday and congratulations Brenda on the articling position!!!  Can't wait to have you downtown again.

Friday, April 8, 2011

Caper Hollandaise

This recipe is simpler (and uses far less butter) than the Julia Child version I made a while back.  It matches wonderfully with smoked salmon and Eggs Benedict and many, many other wonderful things.

Caper Hollandaise

4 egg yolks
2 tablespoons capers, drained
juice of half a lemon
1/4 teaspoon dry mustard powder
1/4 teaspoon cayenne
1/4 cup butter, melted
1/4 cup 1% low-fat milk
½ teaspoon chopped fresh dill

Directions:
Add about 2” water to a small pot and bring to a low boil. Crack eggs into a small metal mixing bowl.

Cook’s Note: Select a pot and mixing bowl combination where the bowl can rest inside the pot but remain suspended several inches above the water to create a double boiler.

Beat egg yolks with a whisk until mixed. Add lemon juice, dry mustard, and cayenne to yolks. Whisk together to combine. Hold metal bowl over pot, and continue to whisk the eggs until they start to thicken. You will also see a small puff of steam come off the bottom of the mixing bowl and the eggs will leave ribbons on the side of the bowl when whisked. Once this stage is reached, remove from heat.

Melt butter in the microwave until liquid, about 10 seconds. Very slowly drizzle the butter into egg yolks a spoonful at a time, whisking to incorporate. Placing back on the double boiler and continue to whisk.

Slowly whisk in milk until smooth. Heat through while whisking until combined. Stir in capers and dill. Ladle several spoonfuls over eggs to serve.