I seem to always be in search of easy but interesting appetizers - things that have great flavour but that do not take a lot of strange ingredients or a lot of time and effort to make. I try to avoid things that might scare a crowd or those I don't cook for often, yet are different enough to keep me interested.
Today I decided to try an Eggplant Caponata. Two of the most popular and highly rated recipes I came across were those from Mario Batali and, of course, Ina Garten. I liked Ina's use of roasted red peppers and capers - two of my favourite ingredients - and Mario's use of cocoa powder to give depth of flavour, so I combined both ideas to end up with the below recipe. The result is fresh tasting, vegetarian and really required little effort beyond the initial roasting and some preparatory peeling and chopping.
I have more friends coming over next weekend, so I think I am going to do Mario's version up and do a comparison.
Eggplant Caponata
(mostly adapted from Ina Garten)
1 large eggplant or 2 medium sized ones
1 teaspoon olive oil
3/4 cup green olives, pitted and chopped
1 medium onion, peeled and finely diced
1-2 large or 3-4 small cloves garlic, peeled and finely chopped
3 tablespoons Italian parsley, minced
2 tablespoons pine nuts, toasted
1 teaspoon cocoa powder
Juice of half a lemon
2 tablespoons capers
2 tablespoons tomato paste
1 tablespoon red wine vinegar
1 tablespoon salt
1 teaspoon ground black pepper
Preheat oven to 400 degrees. Meanwhile, line a baking pan with foil. Cut eggplants in half lengthwise. Rub foil and eggplant with olive oil. Poke eggplants with a fork all over. Place eggplants cut side down on foil lined pan. Bake in preheated oven for 45-50 minutes until eggplant is very soft and can be pierced easily with a knife.
Toast pine nuts in a shallow pan until slightly brown, being sure to keep tossing in a pan so they don't burn - 2-3 minutes should be more than enough. Set aside to cool.
While eggplant is baking, prepare other ingredients if you haven't done so already - chop onion, roasted red pepper, olives, garlic and parsley. Place these ingredients in the bowl of a food processor and pulse to combine. Don't over process - you want to retain some texture.
Once eggplant is soft, remove from oven and allow to cool until easy to handle. Scoop out eggplant pulp removing any large sections of seed, roughly chop, and place in a separate bowl. Discard skin.
Add eggplant to bowl of food processor and pulse to combine again. Add red pepper flakes, tomato paste, cocoa, salt and half of the pine nuts and capers. Pulse again to combine.
Return mixture to a mixing bowl and stir in remaining pine nuts and capers. Add lemon juice and red wine vinegar and stir to combine.
Serve with toasted pita wedges or fresh made or prepared crostini.
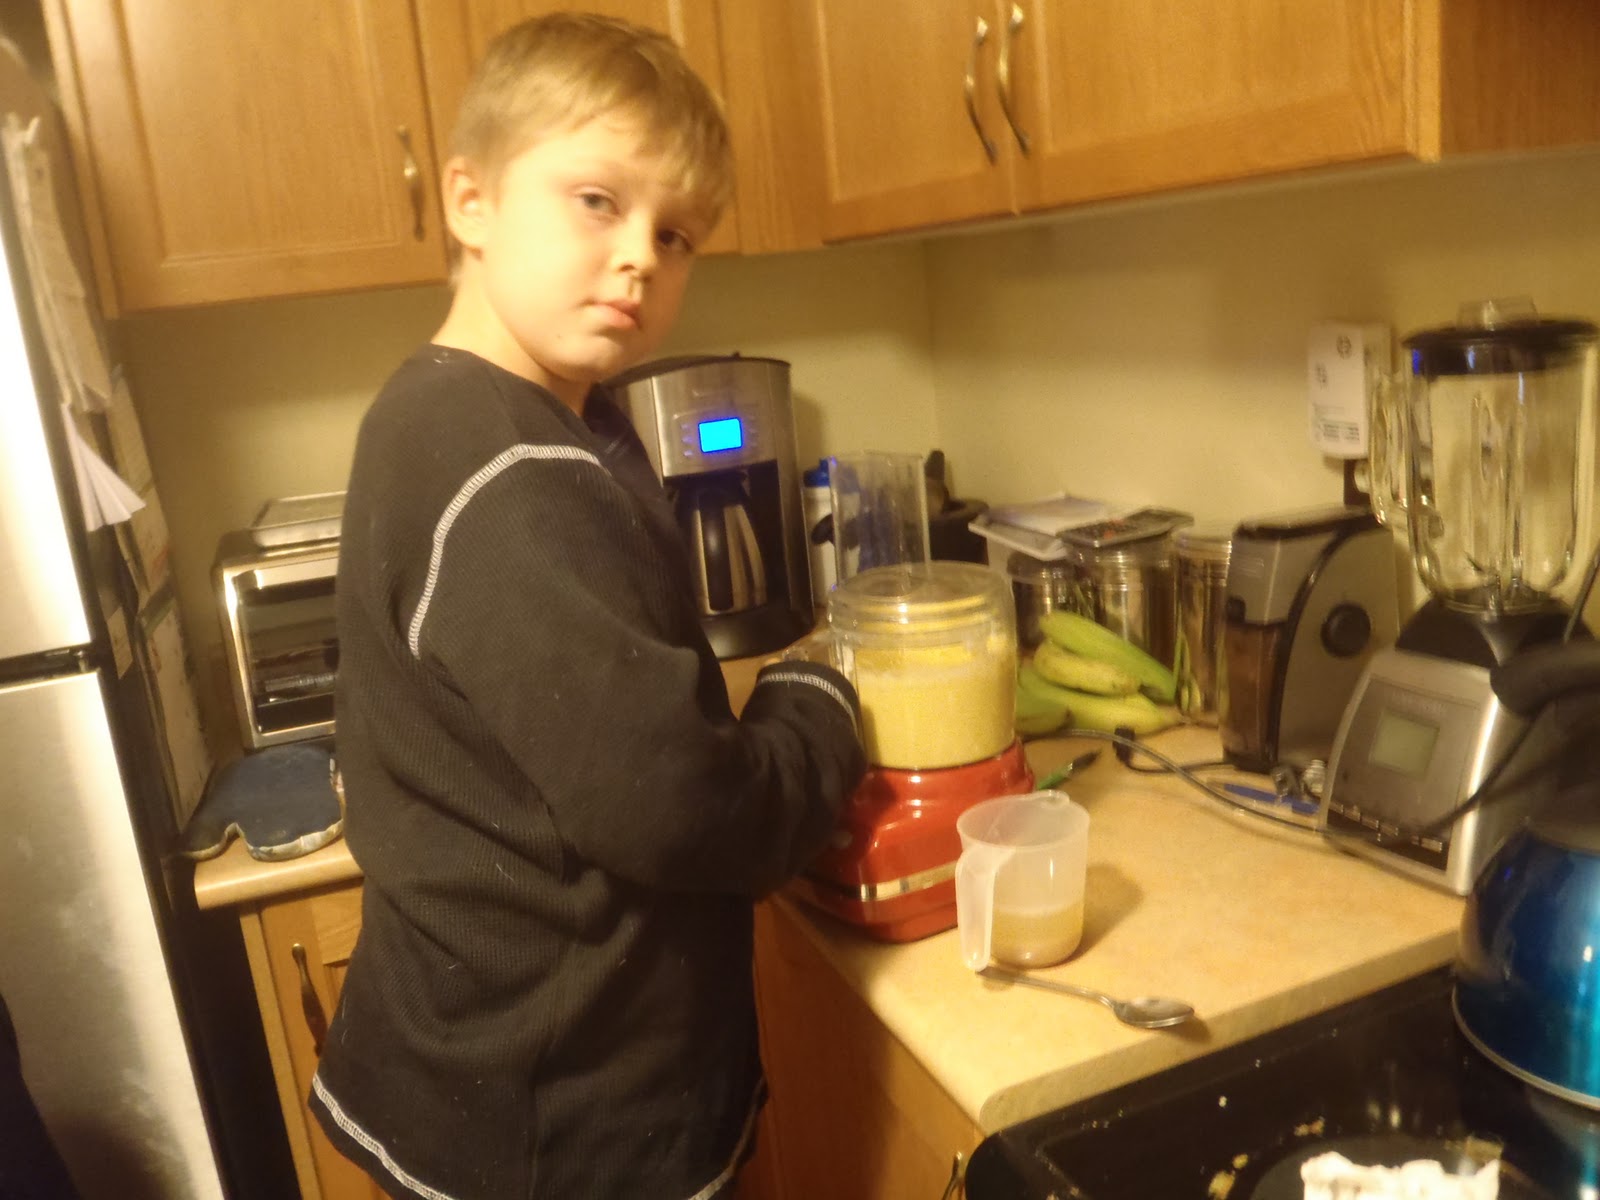
Please excuse the less than stellar food photography this week. My food photographer is on vacation and now making demands for a raise. Or maybe even just a salary. I guess paying in food no longer is enough. Hopefully, he'll be back on the job soon!
Showing posts with label Vegetarian. Show all posts
Sunday, July 10, 2011
Friday, July 8, 2011
Friends for Dinner - Vegetarian
Tonight was fun - got a chance to hang with my old (that is NOT a comment on our age by the way) friends who I went to high school with. Actually, two of the ladies I have known since grade 6! Hard to believe we have known each other so long. Unfortunately, through time we lost touch -well actually I lost touch with them during university.
But through the magic of technology, and Facebook, we managed to reconnect 2 summers ago and I am glad to have them back in my life, even if only electronically mostly and in person once every couple of years. It is true what they say about true friends - you might not see each other for a long time but with true friends you just pick up where you left off. And we did.
Here`s a couple of nice quotes about friendship before I get down to the business of cooking:
A friend is one of the nicest things you can have, and one of the best things you can be. ~Douglas Pagels
But through the magic of technology, and Facebook, we managed to reconnect 2 summers ago and I am glad to have them back in my life, even if only electronically mostly and in person once every couple of years. It is true what they say about true friends - you might not see each other for a long time but with true friends you just pick up where you left off. And we did.
Here`s a couple of nice quotes about friendship before I get down to the business of cooking:
A friend is one of the nicest things you can have, and one of the best things you can be. ~Douglas Pagels
Only your real friends will tell you when your face is dirty. ~Sicilian Proverb
The most beautiful discovery true friends make is that they can grow separately without growing apart. ~Elisabeth Foley
Friendship is unnecessary, like philosophy, like art.... It has no survival value; rather it is one of those things that give value to survival. ~C.S. Lewis
The most beautiful discovery true friends make is that they can grow separately without growing apart. ~Elisabeth Foley
Friendship is unnecessary, like philosophy, like art.... It has no survival value; rather it is one of those things that give value to survival. ~C.S. Lewis
All right....back to the business at hand. My friend Jill who is visiting from Scotland is a vegetarian so I thought since she was coming for dinner that I`d do a full vegetarian menu. That`s why a few weeks ago I experimented with Falafel.
Surprisingly they`ve become very popular with my family, and were a huge hit as lunch when we were camping - who knew!!! Except Brenden tells me he only likes them cold and with ketchup...whatever! You cannot even try to explain the tastes of a 15 year old boy. At least he tried it and has been using up the leftovers from Friday night like crazy!
So here`s our dinner menu:
Appetizers:
Eggplant Caponata with Toasted Pita Chips and Flatbreads
Main:
![]() |
| Pickled Turnips by Toorshi |
Falafel Balls with Taratoor Sauce on Pita
Tomato Mint Chutney
Cucumbers Tossed in Yogurt with Mint and Parlsey
Toorshi Pickled Turnips
Sunday, June 26, 2011
Falafel Balls
Falafel is a golf-ball sized ball patty made from ground chickpeas and spices. The balls are deep fried or baked and served either alone with a salad or in a pita. Typical toppings include lettuce, tomato, pickled turnips, hot sauce and a tahini-based sauce called Taratoor.
I read somewhere recently that McDonalds serves a McFalafel as one of their sandwich options in Egypt even! That just strikes me as plain odd and several kinds of wrong, but McDonalds is as McDonalds does.
Falafel
1 3/4 cup dried chickpeas
2 cloves garlic, lightly crushed
1 small onion, quartered
1 teaspoon ground coriander
1 tablespoon ground cumin
Scant teaspoon cayenne, or to taste
1 cup chopped parsley or cilantro leaves (I did a mix of both)
1 tablespoon salt
1/2 teaspoon black pepper
1/2 teaspoon baking soda
1 tablespoon lemon juice
Corn or vegetable oil for frying
Additional salt for after frying
Put beans in a large bowl and cover with water by 3 or 4 inches. Soak for 24 hours, adding water if needed to keep beans submerged. They will triple in volume over night.
Drain beans well (reserve soaking water) and transfer to a food processor. Add remaining ingredients except oil; pulse until minced but not puréed, scraping sides of bowl down; add soaking water if necessary to allow machine to do its work (I probably added 1/4 a cup in total). Do not add too much liquid or the mixture will not hold together and you will find yourself having to squeeze out any excess to get it to hold together.
Keep pulsing until mixture comes together. Taste, adding salt, pepper, cayenne or lemon juice to taste.
Heat oil in a deep fryer to 350 degrees. If you don't have a deep fryer, a large, deep saucepan will work with about 2-3 inches of oil. Turn heat to medium-high and heat oil to about 350 degrees using a candy thermometer to keep tabs on the heat. A good test to know that the oil is ready is to drop a pinch of batter dropped into the oil - if it is ready it will sizzle immediately.
Scoop heaping tablespoons of batter and shape into balls or small patties. Fry in batches, without crowding, until nicely browned, turning as necessary; total cooking time will be less than 3 minutes. Serve hot or at room temperature.
I thought these turned out fantastic and I think that I will be adding them to my 2011 Xmas party menu, except slightly smaller. Yummy.
Makes 24 balls
Quick Taratoor Sauce
This is a quickie version of the tahini sauce that you get in Middle Eastern restaurants.
Directions:
1/2 cup plain Greek yogurt
1/3 cup Tahini paste
Juice of half a lemon
Salt and pepper to taste
Hot sauce (optional)
Combine all ingredients well. Refrigerate until needed. Serve in spoonfuls on your Falafel.
1/3 cup Tahini paste
Juice of half a lemon
Salt and pepper to taste
Hot sauce (optional)
Combine all ingredients well. Refrigerate until needed. Serve in spoonfuls on your Falafel.
Sunday, June 12, 2011
Yellow Tomato & Gin Gazpacho

Yellow tomatoes are my favourite. Well, yellow AND orange. They are so sweet that it almost feels like you are eating a fruit instead of a vegetable, and I guess, technically you are since a tomato really is a fruit.
Yellow and orange tomatoes are also less acidic than their red cousins, so they do generally need a splash of citrus to balance out their flavour and emphasize their delicate nature. Lime or lemon juice does the trick here.
Yellow Tomato & Gin Gazpacho
8 yellow tomatoes, quartered and seeded (about 3 lbs.)
1 medium yellow pepper, cored, seeded and chopped
1 English cucumber, peeled and chopped
1 jalapeño pepper, cored, seeded and chopped1/4 cup chopped cilantro
1/2 cup gin (Tanqueray if you have it)
1/4 cup Panko breadcrumbs
1/2 red onion, peeled and sliced
1 clove garlic, peeled and sliced
1/4 cup rice wine vinegar
1/4 cup good quality olive oil
1/2 tablespoon salt
1/2 teaspoon white pepper
Directions:
Roughly chop the cucumber, bell pepper, tomatoes and red onion into 1-inch cubes. Put each vegetable into a food processor fitted with a steel blade and pulse until it is coarsely chopped. I like my smoothish but you can even keep a bit of each vegetable aside, finely chopped, to add more texture if needed.
After each vegetable is processed, combine them in a large bowl and add the chopped cilantro, gin, garlic, vinegar, olive oil, salt and pepper. Stir in the Panko. Mix well and chill before serving. The longer gazpacho sits, the more the flavors develop.
This is beautiful as is, or you could garnish with some chopped green cherry tomatoes and some Basil Oil. I have goat cheese in another course, otherwise a little snowy-white chevre might be nice also. Or a dollop of pesto...
Thanks Glen for the beautiful photos. You make me look good!
Roasted Asparagus Salad with Chevre and Honey
The farmer's markets are in full spring mode right now here in Toronto and the main seasonal items on offer are asparagus, rhubarb...and this week Ontario's first strawberries of the year. Of course I bought some of each, as well as a nice assortment of herbs from my usual place in the North Market.
Roasted Asparagus Salad with Chevre and Honey
5 tbsp extra virgin olive oil
1 1/2 tbsp white wine vinegar
2 teaspoon Dijon mustard
Salt and pepper to taste
3 tablespoons pine nuts, toasted
1/2 small log chevre (goat cheese), crumbled
2 bunches of green asparagus
3 cups arugula
Directions:
Preheat oven to 400 degrees.
To make the dressing, beat together 4 tablespoons olive oil with the vinegar and mustard. Season to taste with salt & pepper. Set aside. Roast the pine nuts in a non-stick frying pan until golden brown. Crumble goat cheese. Set aside.
Trim the bottoms of the asparagus stalks to remove any woody bits. You can do this using a knife or just by bending the asparagus spear at the base and it will snap where it is freshest. Lay asparagus in an oven safe casserole, and toss with 1 tablespoon olive oil. Add a little pinch of salt and pepper.
Roast in the oven for about 8-10 minutes (depending on the thickness of the spears) until spears are cooked but still crispy.
To serve, arrange the arugula on a platter and sprinkle with salad dressing. Now place the asparagus on top and sprinkle with a bit more of the dressing. Top with crumbled chevre, pine nuts and a drizzle of honey.
I am finding that I really enjoy going back to the same vendors week after week seeing what they've brought in with them. The fellow I usually get my potatoes from (purple fingerlings are my current fave) was telling me today that he has been bringing his produce to the St. Lawrence Saturday Farmer's Market for 37 years!
There is another vendor outside the Market on Jarvis that I like to get tomatoes from (esp. the multi-coloured cherry tomatoes) and now I have a few options for strawberries. I am thinking of picking up a flat next Saturday since we don't have any plans and $30 plus some work will get me a good amount of strawberry jam.
Today I bought for bundles of Ontario asparagus at $1 each. Quite a bargain for what I'd likely pay $7-$9 for in a grocery store and THAT asparagus still comes from Peru. Incidentally in case you wondered, asparagus is NOT native to Peru....go figure right? However, in the early 90's Peru was granted tariff-free access to U.S. markets as part of the U.S. war on drugs. Basically the U.S. encouraged growing asparagus to deter the growth of coca - the basis for cocaine. Now most of the off-season asparagus you see is from Peru instead of California. Both have year-round growing conditions but the prices that Peruvian farmers can sell for in the market eclipses U.S. production costs - they just can't compete.
Roasted Asparagus Salad with Chevre and Honey
5 tbsp extra virgin olive oil
1 1/2 tbsp white wine vinegar
2 teaspoon Dijon mustard
Salt and pepper to taste
3 tablespoons pine nuts, toasted
1/2 small log chevre (goat cheese), crumbled
2 bunches of green asparagus
3 cups arugula
1 tablespoon honey
Directions:
Preheat oven to 400 degrees.
To make the dressing, beat together 4 tablespoons olive oil with the vinegar and mustard. Season to taste with salt & pepper. Set aside. Roast the pine nuts in a non-stick frying pan until golden brown. Crumble goat cheese. Set aside.
Trim the bottoms of the asparagus stalks to remove any woody bits. You can do this using a knife or just by bending the asparagus spear at the base and it will snap where it is freshest. Lay asparagus in an oven safe casserole, and toss with 1 tablespoon olive oil. Add a little pinch of salt and pepper.
Roast in the oven for about 8-10 minutes (depending on the thickness of the spears) until spears are cooked but still crispy.
To serve, arrange the arugula on a platter and sprinkle with salad dressing. Now place the asparagus on top and sprinkle with a bit more of the dressing. Top with crumbled chevre, pine nuts and a drizzle of honey.
Thursday, June 2, 2011
Golden Beet Hummous
This recipe is a total riff on the Roasted Beet Hummous I made for my Xmas party back in December. The difference here is that instead of using red beets for the red Xmas colour, I used golden beets I got at the Farmer's Market and some wild arugula instead of parsley. The earthiness of the lentils, horseradish and beets worked incredibly well with the pepper and spice of the arugula.
Arugula is probably my favourite salad green. I find things like romaine, iceberg and even leaf lettuce kind of boring, and I do tend to favour things like mâche (also called Lamb Lettuce, which I discovered in Paris years ago) and arugula.
I found the wild arugula to be much more intense than the regular cultivated variety. More pepper, more spice and just an overall explosion of flavour - no wonder the Europeans call it "rocket". Incidentally, food sociologists believe that the word "arugula" is an Americanization of the term "rucula", which is what the green was called by Italian immigrants who came to the U.S. And funnily enough the word "arugula" spell checks as "jugular" and "angular". I always find that kind of thing funny.So for this recipe, I was in a bit of a rush so I did substitute a can of lentils and no one died. Thankfully! With a bit more time, I'd definitely cook the lentils from dried but in a pinch canned ones are ok. I guess.
The arugula worked so well that I think this version is actually even better than the first.
Golden Beet Hummous
1 can green lentils, drained and liquid reserved
3 golden beets, peeled and quartered, then roasted and cooled
1/4 cup tahini
juice of half a lemon
1-2 tablespoons prepared horseradish
1/4 cup reserved lentil canning liquid
1/2 cup wild arugula
In a food processor, combine lentils, beets, tahini, lemon juice, and horseradish and puree until smooth. Add in reserved lentil canning liquid to aid in processing until hummous reaches the smoothness and thickness you like. I used the whole 1/4 cup. Scraping down sides of the processor bowl, add in wild arugula and process to combine. Recipe will keep for about a week at this point, or maybe longer.
Sunday, May 29, 2011
Orange and Roasted Beet Salad with Lemon Fetish
Yes, yes I did say Lemon Fetish, not lemon feta! Lemon Fetish is a sheeps milk cheese we picked up at the Wychwood Barns farmer`s market from Fifth Town Cheese located in Picton, Ontario. Lemon Fetish is a small cylindrical cheese, with a rind washed in Red Fife flour. It tastes like a creamy, lemony, less salty version of feta. It is perfect on a salad of roasted beets, oranges, greens and watercress.
Orange and Roasted Beet Salad with Lemon Fetish
4 large beets (about 1 pound)
1 1/2 tablespoons olive oil for roasting
4 mandarin oranges, peeled
1/4 cup pine nuts
2 oz Fifth Town Lemon Fetish Cheese (or regular feta cheese)
2 cups watercress, arugula or mixed baby greens
4 mandarin oranges, peeled
1/4 cup pine nuts
2 oz Fifth Town Lemon Fetish Cheese (or regular feta cheese)
2 cups watercress, arugula or mixed baby greens
Vinaigrette:
1/4 cup walnut or extra-virgin olive oil
2 tablespoon white wine vinegar
1 teaspoon Dijon mustard
1 tsp liquid honey
Pinch each salt and pepper
1 tsp liquid honey
Pinch each salt and pepper
To roast beets:
Preheat oven to 400 degrees. Put on some rubber gloves. Trim beet tops and scrub beets well if they are young and fresh from the market. If they are a bit older, you may need to peel them a bit to remove any thick skin. Cut beets into quarters (or could be more small pieces if your beets are larger). Place beets in a cast iron pan or other heavy roasting pan, and toss with 1 1/2 tablespoons olive oil. Roast for approximately 45 minutes until beets are fork tender and well caramelized on the outside. Set aside in a bowl to cool slightly.
To make vinaigrette:
In bowl, whisk together oil, shallot, mustard, vinegar, honey, salt and pepper; set aside.
To assemble salad:
Peel oranges and separate into segments and remove any extra pieces of pith. In a pinch you could use a can of mandarin oranges, but as with most things, fresh is best. Set aside in a separate bowl.
In small skillet, toast pine nuts over medium-low heat, stirring often, until lightly browned, about 3 minutes. Cut cheese in to a small dice and set aside.
Place salad greens in a large bowl and toss with half of the dressing. Divide greens over 4 plates. Layer beets and oranges around the salad greens. Sprinkle with nuts; drizzle with remaining vinaigrette. Scatter cheese over top.
Sunday, May 22, 2011
Sauteéd Sunchokes with Roasted Garlic and Thyme
Yesterday was a red letter day in Toronto weather-wise - and it is about time! And as it is the May Two-Four weekend my culinary school is closed (Sorry I was sick last Saturday so I didn't make it to class and hence didn't write about it last week either - just lasagne anyway so nothing interesting missed.) so we decided to hit the Saturday morning Farmer's Market at Wychwood Barns. It is still early in the year for produce but we saw mostly ramps (wild leeks), asparagus, fiddle heads, some potatoes and sunchokes.
These knobby dirty fellows are sunchokes, also called Jerusalem artichokes, and are a tuber I've been meaning to try but just never got around to. They look like a bulbous ginger root, and have the flavour somewhere in between a potato and an artichoke (both things I love). What I did not realize until I started looking into recipes ideas for them, is they are the tuber of the sunflower plant!
The best way to serve them is either peeled and in a pureé or roasted with the skins on, well scrubbed, and any knobby bits removed. I always enjoy potatoes cooked in our extremely well seasoned 19 year old cast-iron skillet (one of my favourite wedding gifts still) so I went for the latter option. And it was a big hit with everyone.
Sauteéd Sunchokes with Roasted Garlic and Thyme
1 1/2 pounds sunchokes (also called Jerusalem artichokes), sliced into 1/4 inch rounds
6 cloves of garlic, peeled left whole
2 tablespoons olive oil (sunflower seed oil would be good too!)
A good pinch salt and pepper
2 Tablespoons parsley, chopped
3 sprigs fresh thyme
Preheat the oven to 425 degrees. Scrub the sunchokes well under cold running water, scrape with a paring knife to remove any knobby bits, then slice 1/4-inch thick. Add the sunchokes and garlic to a cast iron or other heavy pan and toss with the olive oil so the bottom of the pan and the sunchokes are lightly coated. Add thyme, salt and pepper. Bake for 30 minutes, until the sunchokes are tender inside, like a potato.
We are serving this with grilled chicken marinated in a smoked paprika Spice Rub.
Happy Victoria Day Weekend!
Sauteéd Sunchokes with Roasted Garlic and Thyme
1 1/2 pounds sunchokes (also called Jerusalem artichokes), sliced into 1/4 inch rounds
6 cloves of garlic, peeled left whole
2 tablespoons olive oil (sunflower seed oil would be good too!)
A good pinch salt and pepper
2 Tablespoons parsley, chopped
3 sprigs fresh thyme
Preheat the oven to 425 degrees. Scrub the sunchokes well under cold running water, scrape with a paring knife to remove any knobby bits, then slice 1/4-inch thick. Add the sunchokes and garlic to a cast iron or other heavy pan and toss with the olive oil so the bottom of the pan and the sunchokes are lightly coated. Add thyme, salt and pepper. Bake for 30 minutes, until the sunchokes are tender inside, like a potato.
We are serving this with grilled chicken marinated in a smoked paprika Spice Rub.
Happy Victoria Day Weekend!
Tuesday, May 10, 2011
Basic Tomato Sauce
One of the most serviceable dishes anyone can learn to make is a basic tomato sauce. Going back in time a bit, it is one of the five French mother sauces and serves as the basis for many, many other sauces.
Basic Tomato Sauce
1 tablespoon extra-virgin olive oil
1 large onion, finely diced
3 garlic cloves, peeled and thinly sliced
6-8 basil leaves, roughly chopped
1/2 medium carrot, finely grated
2 jars Passata (San Marzano tomatoes are preferred as they are the best)
Basic Tomato Sauce
1 tablespoon extra-virgin olive oil
1 large onion, finely diced
3 garlic cloves, peeled and thinly sliced
6-8 basil leaves, roughly chopped
1/2 medium carrot, finely grated
2 jars Passata (San Marzano tomatoes are preferred as they are the best)
Salt and pepper to taste
Directions:
In a large, heavy saucepan, heat the olive oil over medium heat. Add the onion and garlic, and cook until soft and light golden brown, about 8 to 10 minutes. Add the carrot, and cook 5 minutes more, until the carrot is quite soft. Add the tomatoes and juice and bring to a boil, stirring often. Lower the heat and simmer for 30 minutes until as thick as hot cereal. Season with salt and serve.
This sauce holds 1 week in the refrigerator or up to 6 months in the freezer.
Directions:
In a large, heavy saucepan, heat the olive oil over medium heat. Add the onion and garlic, and cook until soft and light golden brown, about 8 to 10 minutes. Add the carrot, and cook 5 minutes more, until the carrot is quite soft. Add the tomatoes and juice and bring to a boil, stirring often. Lower the heat and simmer for 30 minutes until as thick as hot cereal. Season with salt and serve.
This sauce holds 1 week in the refrigerator or up to 6 months in the freezer.
Sunday, May 1, 2011
Boursin Cheese Mashed Potatoes
I really enjoy mashed potatoes and find them to be the perfect vehicle to add really great flavour to. In this case, I am adding a package of herbed Boursin cheese...pretty simple but yummy. The alternative is to add a log of goat cheese, but I thought I would try this version out since I have a close friend who has an allergy to goat cheese, so I wanted an alternative. Turned out really well.
Boursin cheese is a soft and creamy cheese, with a texture similar to cream cheese. It comes in a variety of flavours and I find incorporates into hot dishes like mashed potatoes easier than goat cheese.
Boursin Cheese Mashed Potatoes
6 medium sized mashing potatoes, scrubbed
2 tablespoons butter
Boursin cheese is a soft and creamy cheese, with a texture similar to cream cheese. It comes in a variety of flavours and I find incorporates into hot dishes like mashed potatoes easier than goat cheese.
Boursin Cheese Mashed Potatoes
6 medium sized mashing potatoes, scrubbed
2 tablespoons butter
1 cup hot milk
1 package Boursin Cheese with herbs
Salt and pepper to taste
Directions:
Peel and quarter the potatoes and put them into a large saucepan with enough cold water to cover them. Add 1 teaspoon salt. Bring to a boil, reduce heat and simmer for about 20 minutes or until they are fork tender.
Heat the milk in a glass measuring cup in the microwave or in a small saucepan. Add to the potatoes and mash thoroughly. Stir in 2 tablepsoons of butter. Mix in the Boursin cheese, bring back to heat, and serve immediately.
Directions:
Peel and quarter the potatoes and put them into a large saucepan with enough cold water to cover them. Add 1 teaspoon salt. Bring to a boil, reduce heat and simmer for about 20 minutes or until they are fork tender.
Heat the milk in a glass measuring cup in the microwave or in a small saucepan. Add to the potatoes and mash thoroughly. Stir in 2 tablepsoons of butter. Mix in the Boursin cheese, bring back to heat, and serve immediately.
Saturday, April 30, 2011
Betty Draper's "Gazpacho from Spain"
So even though it could be months until I hear from Food Network about my "casting opportunity", I figured I might as well continue testing the various recipes I had in mind for my menu. I did tell you that I auditioned for a TV show on Food right? Maybe not exactly, but oh well....I'll tell you about it another time....just waiting to hear now. Could be months, but a girl has to eat! Eventually the menu will come together for you all, and I'll share, but for now I'll just leave clues. The first is in today's post's title. Then we had the deviled eggs of last weekend...hmmm. What could it be?
So today's adventure takes us to Spain to make Gazpacho. Once again, I am turning the the Barefoot Contessa herself, Ina Garten for the base recipe. The only thing I did differently was I added some red pepper flakes and about 1/4 cup of bread crumbs. I am used to seeing that in these kinds of recipes so I added some here for body.
Gazpacho
1 hothouse cucumber, halved and seeded, but not peeled
2 red bell peppers, cored and seeded
1/4 cup breadcrumbs from day-old bread
4 plum tomatoes
1 red onion
3 garlic cloves, minced
23 ounces tomato juice (3 cups)
1/4 cup white wine vinegar
1/4 cup good olive oil
1/2 tablespoon kosher salt
1 teaspoons freshly ground black pepper
Directions:
Roughly chop the cucumbers, bell peppers, tomatoes and red onions into 1-inch cubes. Put each vegetable separately into a food processor fitted with a steel blade and pulse until it is coarsely chopped. Do not over-process! You can even keep a bit of each vegetable aside, finely chopped, to add texture if needed.
After each vegetable is processed, combine them in a large bowl and add the garlic, tomato juice, vinegar, olive oil, salt and pepper. Mix well and chill before serving. The longer gazpacho sits, the more the flavors develop.
Saturday, January 29, 2011
Vegetarian Thai Chili with Bulgur
So back in December I made this chili recipe from Clean Eating magazine with ground turkey for my Xmas party and it turned out really well. It could have used a bump in the spice department for me, but that is easily achieved. Also I found it a bit odd that there was no use of kafir lime, cilantro or fish sauce in a Thai recipe...huh? So this time I modified things more to my taste.
This is the first time I am cooking with bulgur. To be honest, the only reason I didn't make the recipe with bulgur originally back in December was that my local grocery store didn't have it! Well, since then I have bought some and I thought I'd try this recipe out again. Nothing better than a belly-warming chili to chase away the -20 temperatures in Toronto (-33 with the windchill....brrrr). Sadly I have to be careful with the heat if there is any chance that the youngest will eat it. The Teen is all about the heat, like us, but sometimes I think Justin was switched at birth! I guess I'll give him a few more years to catch up with us on the Scoville scale.
Vegetarian Thai Chili with Bulgur
4 tsp thai red curry paste (mine seemed very mild heat wise so use your judgement here)
2-3 Thai bird chilis or more (to your desired heat)
2 tsp ground cumin
4 cups vegetable stock
1 cup uncooked bulgar
1 large green or red pepper, chopped
1 can of kidney beans, drained
3 kafir lime leaves (optional)
1 cup light coconut milk
2 cups tomato purée or passata
2 green onions, choppped
1/2 cup cilantro, chopped
salt and pepper to taste
1 tsp fish sauce
In a medium sized pot, add curry paste, cumin and 1/4 cup stock. Stir mixture until curry paste dissolves slighty. Add remaining broth, bulgur and red pepper. Bring mixture to a boil over high heat, then cover tightly with a lid, reduce heat to medium and cook for 10 minutes.
Add beans, coconut milk and tomato purée to the pot and cook uncovered for 10-15 minutes or until bulgur is tender and chili has thickened. Stir in fish sauce right before serving. Season with salt and pepper and sprinkle with green onions and more cilantro to serve.
Cook's Note: I made the mistake of using a store bought commercial brand so the curry was very mild. Store bought is ok but you won't get the heat unless you use a proper brand like Mae Sri.
Why did I not make my own like the one that Don Duong taught me in my Thai cooking classes years ago?!?! If I remember correctly Don was born in Vietnam but was raised in Thailand and learned to cook Thai by his grandmother, whose recipes he taught my friend Ann and I at George Brown College. Don is an amazingly accomplished pastry chef who was a pastry chef for the Metro Convention Centre at the time, but now owns his own successful business at Dessert Trends which has a commercial location on Weston Road amazingly around the corner from where I live currently and a new location on Harbord Street. I still use his family recipes for Thai food and will always know because of him that Pad Thai does not use ketchup!
This is the first time I am cooking with bulgur. To be honest, the only reason I didn't make the recipe with bulgur originally back in December was that my local grocery store didn't have it! Well, since then I have bought some and I thought I'd try this recipe out again. Nothing better than a belly-warming chili to chase away the -20 temperatures in Toronto (-33 with the windchill....brrrr). Sadly I have to be careful with the heat if there is any chance that the youngest will eat it. The Teen is all about the heat, like us, but sometimes I think Justin was switched at birth! I guess I'll give him a few more years to catch up with us on the Scoville scale.
Vegetarian Thai Chili with Bulgur
4 tsp thai red curry paste (mine seemed very mild heat wise so use your judgement here)
2-3 Thai bird chilis or more (to your desired heat)
2 tsp ground cumin
4 cups vegetable stock
1 cup uncooked bulgar
1 large green or red pepper, chopped
1 can of kidney beans, drained
3 kafir lime leaves (optional)
1 cup light coconut milk
2 cups tomato purée or passata
2 green onions, choppped
1/2 cup cilantro, chopped
salt and pepper to taste
1 tsp fish sauce
In a medium sized pot, add curry paste, cumin and 1/4 cup stock. Stir mixture until curry paste dissolves slighty. Add remaining broth, bulgur and red pepper. Bring mixture to a boil over high heat, then cover tightly with a lid, reduce heat to medium and cook for 10 minutes.
Add beans, coconut milk and tomato purée to the pot and cook uncovered for 10-15 minutes or until bulgur is tender and chili has thickened. Stir in fish sauce right before serving. Season with salt and pepper and sprinkle with green onions and more cilantro to serve.
Cook's Note: I made the mistake of using a store bought commercial brand so the curry was very mild. Store bought is ok but you won't get the heat unless you use a proper brand like Mae Sri.
Why did I not make my own like the one that Don Duong taught me in my Thai cooking classes years ago?!?! If I remember correctly Don was born in Vietnam but was raised in Thailand and learned to cook Thai by his grandmother, whose recipes he taught my friend Ann and I at George Brown College. Don is an amazingly accomplished pastry chef who was a pastry chef for the Metro Convention Centre at the time, but now owns his own successful business at Dessert Trends which has a commercial location on Weston Road amazingly around the corner from where I live currently and a new location on Harbord Street. I still use his family recipes for Thai food and will always know because of him that Pad Thai does not use ketchup!
Thursday, November 11, 2010
Edamame Hummous - Success is mine!
So after a bit of re-jigging I have a successful recipe for Edamame Hummous. It has a bit of heat to it, thanks to the wasabi but I like it. This dip has the flavours and balance I was searching for.
Edamame Hummous
2 cups frozen shelled edamame beans
1 clove garlic puree
2 green onions, chopped - white parts only
1/2 tsp. grated lime zest
2 tbsp. mayonnaise
1 tbsp sesame oil
1 tbsp soy sauce
1 tbsp minced fresh ginger or ginger puree
1 tsp wasabi
toasted sesame seeds for garnish
Cook edamame according to package directions. Drain well. Reserving some edamame for garnish, put remaining beans in a food processor with garlic, green onions, lime zest, mayonnaise, sesame oil, soy sauce, ginger and wasabi. Puree until smooth, scraping down sides of food processor bowl several times.
Scrape dip into serving bowl and garnish with reserved edamame, sesame seeds. Serve with rice crackers, baked wonton wrappers or vegetables.
Edamame Hummous
2 cups frozen shelled edamame beans
1 clove garlic puree
2 green onions, chopped - white parts only
1/2 tsp. grated lime zest
2 tbsp. mayonnaise
1 tbsp sesame oil
1 tbsp soy sauce
1 tbsp minced fresh ginger or ginger puree
1 tsp wasabi
toasted sesame seeds for garnish
Scrape dip into serving bowl and garnish with reserved edamame, sesame seeds. Serve with rice crackers, baked wonton wrappers or vegetables.
Monday, November 8, 2010
Recipe Test: Roasted Beet Hummous
One of the first things I’ve decided I must research for the Xmas Open House is some new takes on dips, mostly because dips and spreads that are not mayonnaise-based do tend to hold well on the table of an open house and lend themselves to being served on an assortment of vessels. Given the variety of dietary issues I have to consider among my guests, I will have to give some thought to said vessels, but chances are the selection will include items such as traditional crackers, gluten-free crackers, cucumber slices and maybe some kind of baked vegetable chip? Suggstions? Also, you can generally make them about a week ahead and store well sealed in your fridge until a few hours before party time.
So as a starting point for the recipe test, I have decided to do a trio of hummous. There is just something I like about saying a “trio” of this or a “trio” of that. Sounds chic before I even lift a finger, LOL. Given that we are in the midst of the holiday season, and it IS a holiday party, I decided to see if I could stretch my culinary concept of hummous a bit and come up something in seasonal colours (white, red and green) to keep things festive.
Tonight, the first recipe to be tested will be the “red” in the traditional Christmas trinity - represented by a beet hummous. When I went to get beets this weekend, the red ones looked old, so I opted for some beautiful golden ones just for practice. I`ll find some nice red ones for the holidays.
One of my favourite tricks for hummous and bean spreads if I am using canned beans is to reserve the canning liquid, and use it as a substitute for oil in the recipe. It can basically eliminate the need to add oil and unnecessary fat in an otherwise healthy dip. Generally, once I’ve drained the canned beans I do rinse them, as I often find that adding back in some of the canning liquid can completely eliminate the need for further salting.
The below recipe started with the inspiration from this season`s BH&G Appetizers Magazine. It called for cannellini beans and a can of cooked beets. Talk about blech and boring. I made a modification to the recipe to use lentils, and I roasted 3 very large yellow beets in the oven yesterday to make the most of their natural sugars. Otherwise, the recipe is very good and the outcome was earthy but the taste of the beets shone through. T-Rex was quite surprised to learn he ate `horseradish` but was relieved to hear that no actual horses were hurt in the making of the radish.... :-)
Roasted Beet Hummous:
1 can green lentils, drained and liquid reserved
1 bunch beets, peeled and quartered, then roasted and cooled
So as a starting point for the recipe test, I have decided to do a trio of hummous. There is just something I like about saying a “trio” of this or a “trio” of that. Sounds chic before I even lift a finger, LOL. Given that we are in the midst of the holiday season, and it IS a holiday party, I decided to see if I could stretch my culinary concept of hummous a bit and come up something in seasonal colours (white, red and green) to keep things festive.
I have also enlisted some help in my test kitchen. He is an up and coming chef with the most serious knife skills any soon to be 10 year old could possess. He has a palate that I find quite intriguing and discerning for someone so young...his favourite things to eat include unagi, roasted beets, salmon and apparently my ribs. Sadly he hasn`t completely given McDonalds the heave-ho but I have faith. And he certainly has embraced the one food rule I have in my house - try it before you say you don`t like it.
Tonight, the first recipe to be tested will be the “red” in the traditional Christmas trinity - represented by a beet hummous. When I went to get beets this weekend, the red ones looked old, so I opted for some beautiful golden ones just for practice. I`ll find some nice red ones for the holidays.
One of my favourite tricks for hummous and bean spreads if I am using canned beans is to reserve the canning liquid, and use it as a substitute for oil in the recipe. It can basically eliminate the need to add oil and unnecessary fat in an otherwise healthy dip. Generally, once I’ve drained the canned beans I do rinse them, as I often find that adding back in some of the canning liquid can completely eliminate the need for further salting.
The below recipe started with the inspiration from this season`s BH&G Appetizers Magazine. It called for cannellini beans and a can of cooked beets. Talk about blech and boring. I made a modification to the recipe to use lentils, and I roasted 3 very large yellow beets in the oven yesterday to make the most of their natural sugars. Otherwise, the recipe is very good and the outcome was earthy but the taste of the beets shone through. T-Rex was quite surprised to learn he ate `horseradish` but was relieved to hear that no actual horses were hurt in the making of the radish.... :-)
Roasted Beet Hummous:
1 can green lentils, drained and liquid reserved
1 bunch beets, peeled and quartered, then roasted and cooled
1/4 cup tahini
juice of half a lemon
1 tablespoon prepared horseradish
2 cloves garlic, finely chopped
1/4 cup reserved lentil canning liquid
2 tbsp parsley, chopped (optional)
In a food processor, combine lentils, beets, tahini, lemon juice, horseradish, garlic and puree until smooth. Add in reserved lentil canning liquid to aid in processing until hummous reaches the smoothness and thickness you like. I used the whole 1/4 cup. Scraping down sides of the processor bowl, add in parsley if desired and process to combine. Recipe will keep for about a week at this point, or maybe longer.
I`ll take this into work tomorrow for my second group of food tasters to comment on (Compliance Officers are really well behaved and very nice, especially when you feed them).
The second colour to be tested will be “white” (porobably tomorrow) so I have decided to use white kidney beans as my base. I know that rosemary, sage, thyme and basil work well with white beans, but in an effort to avoid duplication of flavours with my Butternut Squash Crostini, I am going to focus on just rosemary, mostly because I love the smell but also because it looks a bit like pine branches, and will hopefully liven up the otherwise dull white beans.
juice of half a lemon
1 tablespoon prepared horseradish
2 cloves garlic, finely chopped
1/4 cup reserved lentil canning liquid
2 tbsp parsley, chopped (optional)
In a food processor, combine lentils, beets, tahini, lemon juice, horseradish, garlic and puree until smooth. Add in reserved lentil canning liquid to aid in processing until hummous reaches the smoothness and thickness you like. I used the whole 1/4 cup. Scraping down sides of the processor bowl, add in parsley if desired and process to combine. Recipe will keep for about a week at this point, or maybe longer.
I`ll take this into work tomorrow for my second group of food tasters to comment on (Compliance Officers are really well behaved and very nice, especially when you feed them).
The second colour to be tested will be “white” (porobably tomorrow) so I have decided to use white kidney beans as my base. I know that rosemary, sage, thyme and basil work well with white beans, but in an effort to avoid duplication of flavours with my Butternut Squash Crostini, I am going to focus on just rosemary, mostly because I love the smell but also because it looks a bit like pine branches, and will hopefully liven up the otherwise dull white beans.
Monday, October 11, 2010
Meatfree Monday - Vegetarian Shepherds Pie
My friend Ann introduced me to the original recipe for Vegetarian Shephers Pie from allrecipes.com a month or so ago. I am finding myself a bit meated out today, so this will do just the trick. Additionally, it will use up the left over mashed potatoes from yesterdays dinner and some other potatoes I made a few weeks ago and froze. And it fits the bill of using up stuff in my pantry and freezer.
I did modify the recipe in accordance with my taste preferences and pantry items on-hand. I have included a link to the original recipe in case you are interested. I can't imagine walnuts in a Shepherds Pie so I substituted soy ground protein and I added some other ingredients to enhance the flavour to suit our tastes. If I had them on hand, I probably would have tossed in a chopped tomato also. Sadly everything is closed today in Toronto, as it is a holiday, so we had to make do with what we had.
Vegetarian Shepherds Pie
Ingredients:
3.5 cups vegetable broth
1/2 cup dry lentils
1/4 cup pearl barley
1/2 cup TVP or ground soy protein (we buy Sunfield brand soy protein at MEC)
1-2 tsp curry powder (optional)
I did modify the recipe in accordance with my taste preferences and pantry items on-hand. I have included a link to the original recipe in case you are interested. I can't imagine walnuts in a Shepherds Pie so I substituted soy ground protein and I added some other ingredients to enhance the flavour to suit our tastes. If I had them on hand, I probably would have tossed in a chopped tomato also. Sadly everything is closed today in Toronto, as it is a holiday, so we had to make do with what we had.
Vegetarian Shepherds Pie
Ingredients:
3.5 cups vegetable broth
1/2 cup dry lentils
1/4 cup pearl barley
1/2 cup TVP or ground soy protein (we buy Sunfield brand soy protein at MEC)
1-2 tsp curry powder (optional)
1 or two sprig fresh thyme (thanks Kerryn for bringing the lemon thyme from your garden yesterday)
1-2 cloves garlic, finely chopped
2 shallots, finely chopped or half an onion, peeled and chopped or 2 tbsp. onion flakes
1/4 c low fat sour cream
2-3 cups leftover mashed potatoes (or 3 potatoes to chop, cook and mash as you like them)
2 shallots, finely chopped or half an onion, peeled and chopped or 2 tbsp. onion flakes
1/4 c low fat sour cream
2-3 cups leftover mashed potatoes (or 3 potatoes to chop, cook and mash as you like them)
1 large carrot, diced (I had cooked ones left from Thanksgiving)
salt and pepper to taste
Directions:
salt and pepper to taste
Directions:
- Preheat oven to 350 degrees F (175 degrees C).
- In a large saucepan over medium-low heat, combine broth with TVP or soy ground protein, lentils and barley. Simmer until tender, for 30-40 minutes. When ready, remove from heat and stir in sour cream and carrots. Remove thyme sprig lest anyone eating get a twig in their dinner.
- If making the potatoes from scratch, bring a large pot of salted water to a boil while the filling is cooking,. Add potatoes and cook until tender but still firm, about 15-20 minutes. Drain and mash.
- Pour mixture into a 2 quart casserole dish and then spoon mashed potatoes over lentil mixture.
- Bake in preheated oven until lightly browned on top, about 30 minutes. If you want the topping brown and crispy, melt a little butter and brush over top with a pastry brush.
Subscribe to:
Posts (Atom)